
Fried Liver Attack
A daring knight sacrifice on f7 that drags Black's king into the open. One of the most aggressive openings in chess.
Try Interactive LessonIntroduction
Lesson Content
Start by controlling the center with your king pawn.
e4 — The King's Pawn opening — White claims the center and opens diagonals for the queen and kingside bishop. The most popular first move in chess. Black's main responses: - 1. ..e5 — Open Game, matching White's center - 1. ..c5 — Sicilian Defense, fighting for d4 asymmetrically - 1. ..e6 — French Defense, preparing ..d5 - 1. ..c6 — Caro-Kann, also preparing ..d5
Black mirrors White's central claim, establishing a symmetrical pawn center. This leads to the Open Games — the oldest and most classical family of openings. The e5 pawn controls d4 and f4, limiting White's expansion options.
Develop your knight toward the center while attacking the e5 pawn.
♘︎f3 — White develops the knight to its most natural square, attacking the e5 pawn immediately. The knight also controls d4 and prepares kingside castling. This is the most common second move, leading to a vast tree of openings including the Italian, Ruy Lopez, and Scotch.
Black defends the e5 pawn with the most natural developing move. The knight on c6 also controls the important d4 and e5 squares. From here White's third move defines the opening: - 3. ♗︎c4 — Italian Game - 3. ♗︎b5 — Ruy Lopez - 3. d4 — Scotch Game - 3. ♘︎c3 — Three/Four Knights
Develop your bishop to target the weak f7 square.
♗︎c4 — The bishop develops to c4, aiming at Black's vulnerable f7 square — the weakest point in the starting position since only the king defends it. This is the defining move of the Italian Game. White's alternatives here lead to entirely different openings: - 3. ♗︎b5 — the Ruy Lopez, pressuring the ♘︎c6 defender - 3. d4 — the Scotch Game, immediately challenging the center - 3. ♘︎c3 — the Three/Four Knights, delaying the decision
The Two Knights Defense — Black develops aggressively, counterattacking White's e4 pawn rather than passively defending. This is more combative than 3. ..♗︎c5. Black invites the sharp Knight Attack (4. ♘︎g5) or the calmer 4. d3.
Attack f7 by bringing a second piece to bear on it.
♘︎g5 — The Knight Attack! White moves the already-developed knight a second time, breaking the general opening principle of developing new pieces. But the justification is concrete — the knight joins the bishop in a double attack on f7. This is the start of the sharpest lines in the Italian Game. White's alternatives: - 4. d3 — calm and positional, the modern main line - 4. d4 — the Open Variation, more aggressive
Alternative Moves
The only good defense. Black counterattacks in the center, blocking the ♗︎c4's diagonal and gaining space. After 4. ..d5, the e4 pawn is attacked and the position opens up. Other moves are worse: - 4. ..♗︎c5 — the Traxler Counterattack, extremely sharp but risky - 4. ..h6? — chasing the knight loses time and weakens the kingside
Alternative Moves
Capture the pawn to reopen your bishop's line to f7.
exd5 — White captures, removing the d5 pawn that was blocking the bishop's diagonal. Now Black must decide how to recapture — a critical branching point that determines the entire opening.
Black recaptures with the knight, centralizing on d5. But this allows the famous Fried Liver sacrifice! The knight on d5 no longer defends f7. The modern main line is 5. ..♘︎a5, moving the knight to attack the bishop while keeping f7 defended by the ♘︎f6. That's how top players avoid the Fried Liver entirely.
Alternative Moves
Sacrifice your knight on the weakest point in Black's position!
♘︎xf7 — The Fried Liver sacrifice! White gives up the knight to destroy Black's king safety. The knight on f7 forks the queen and rook, but more importantly, it forces Black's king to move — losing the right to castle forever. This sacrifice has been played for over 400 years and remains dangerous even at the highest level.
Alternative Moves
Black must accept the sacrifice — the knight was forking the queen and rook. But now the king stands on f7, exposed and unable to castle. White's initiative begins.
Check the king while attacking the undefended knight.
♕︎f3+ — Check! The queen attacks both the exposed king and the undefended ♘︎d5. Black has only one square — ♔︎e6 — since ♔︎e8 drops the knight and ♔︎g8/♔︎e7 also lose material. This is the key follow-up: White's queen and bishop combine to chase the king deeper into the center.
The king walks into the danger zone — but it's the only move that doesn't lose the ♘︎d5 immediately. Black's king on e6 looks terrifying, but with precise play Black can survive and even hold.
Develop your knight while threatening the centralized Nd5.
♘︎c3 — White develops the knight with a direct threat — ♘︎xd5 would attack the king and win material. The knight also eyes e4, which could support a future d4 push. Development with threats is the hallmark of good attacking chess. White already has three pieces active while Black's king is stranded in the center.
Alternative Moves
The knight jumps to b4, escaping the threat of ♘︎xd5 while eying the c2 square. Black is trying to create counterplay against White's king position.
Alternative Moves
Castle to safety and activate your rook.
O-O — White castles, tucking the king to safety and bringing the rook to the f-file where it eyes the exposed Black king. White now has full development while Black's king is still stuck in the center. The contrast in king safety is striking — White is fully castled while Black's king sits on e6 with no shelter.
Alternative Moves
Black reinforces the center with ..c6, supporting the d5-knight and creating a retreat square on c7 for the king. This solid move shores up Black's position before White can build more pressure.
Open the center to exploit Black's exposed king.
White opens the center with the thematic d4 push, challenging Black's e5 pawn and opening lines for the bishop and rook. With Black's king on e6, every open line is a potential avenue of attack. White has a powerful initiative: full development, a safe king, and open lines pointing at Black's exposed monarch.
Alternative Moves
Key Takeaways
- The ♗︎c4 + ♘︎g5 battery creates a double attack on the weak f7 square
- 5...♘︎xd5 allows the sacrifice — 5...♘︎a5 is the modern way to avoid the Fried Liver
- 6.♘︎xf7! sacrifices the knight to permanently expose Black's king
- After ♕︎f3+ ♔︎e6, White develops with tempo (♘︎c3 threatens ♘︎xd5)
- White's advantage lies in superior development and king safety, not material
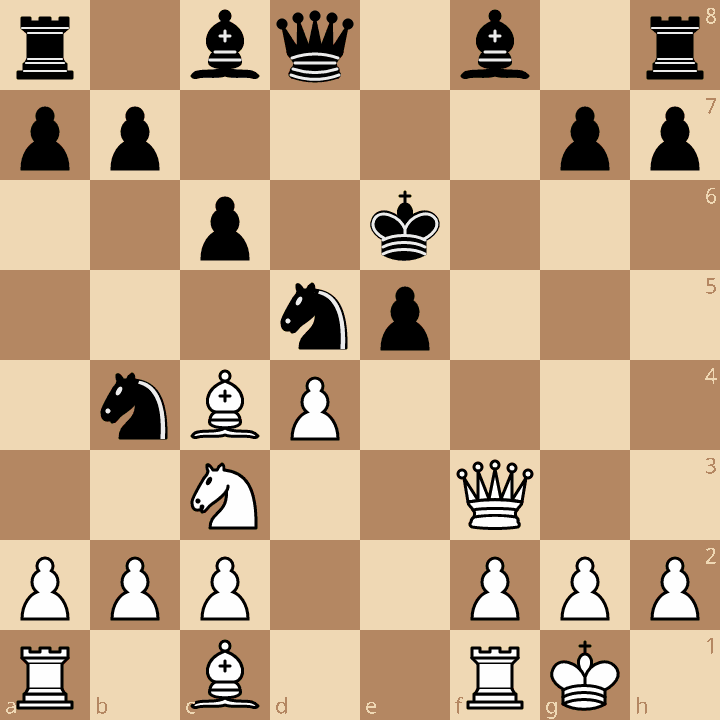
Now play it through
Step through every move on a real board, try the wrong ones, and ask Knighty why they fail.
Related Lessons
Summary
Ready to Practice?
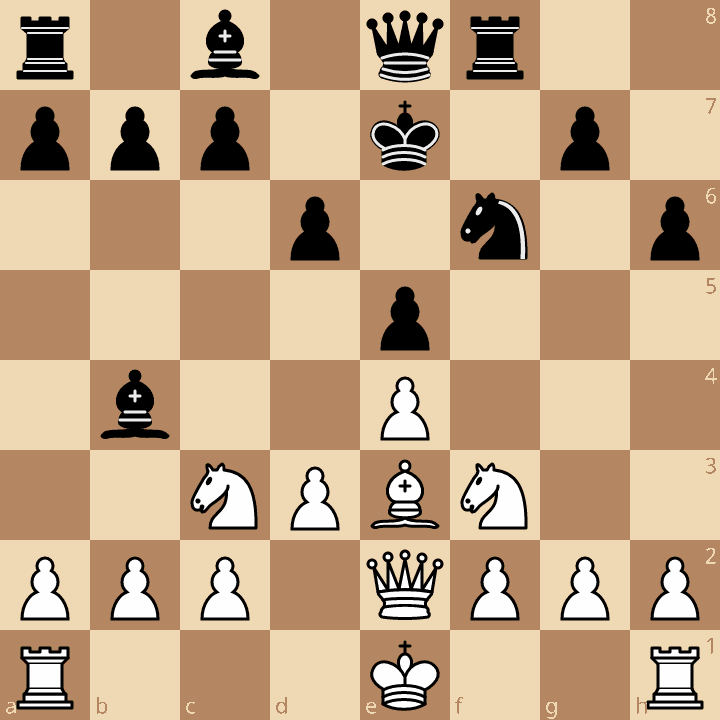
Next in this opening family
Traxler Counterattack
Take this lesson with you
Free account requiredWith every variation — opens in Lichess & ChessBase