
Smith-Morra Gambit
White sacrifices a pawn for rapid development, open lines, and attacking chances against the Sicilian Defense
Try Interactive LessonIntroduction
Lesson Content
Start by controlling the center with your king pawn.
e4 — The King's Pawn opening — White claims the center and opens diagonals for the queen and kingside bishop. The most popular first move in chess. Black's main responses: - 1. ..e5 — Open Game, matching White's center - 1. ..c5 — Sicilian Defense, fighting for d4 asymmetrically - 1. ..e6 — French Defense, preparing ..d5 - 1. ..c6 — Caro-Kann, also preparing ..d5
The Sicilian Defense — Black's most popular and ambitious reply to 1. e4. Rather than matching White in the center with ..e5, Black fights for the d4 square asymmetrically. The Sicilian leads to unbalanced positions where both sides have chances. White typically gets a kingside attack; Black gets queenside counterplay and the c-file.
Strike the center immediately to begin the gambit.
The Smith-Morra Gambit begins! Instead of the standard 2. ♘︎f3, White immediately strikes in the center with d4, offering a pawn sacrifice. The idea is to open lines rapidly and gain a development advantage. White's alternatives lead to very different openings: - 2. ♘︎f3 — the Open Sicilian, the most popular approach - 2. ♘︎c3 — the Closed Sicilian or Grand Prix Attack - 2. c3 — the Alapin Variation, a positional approach
Alternative Moves
Black captures the d4 pawn — virtually forced, as declining with ..e6 or ..d6 would give White a dominating center for free. Now White must decide how to recapture. The capture half-opens the c-file and gives Black an extra pawn, but White's plan is to sacrifice further for rapid development.
Offer the pawn sacrifice that defines this gambit.
The defining move of the Smith-Morra! White offers a second pawn to rip open the center. After Black captures with ..dxc3, White recaptures with the knight, gaining a tempo and a powerful piece on c3. Black can decline with 3. ..d3 or 3. ..♘︎f6, but accepting is the critical test: - 3. ..dxc3 — accepts the gambit (main line) - 3. ..♘︎f6 — transposes to the Alapin Sicilian - 3. ..d3 — gives the pawn back but concedes White a great center
Alternative Moves
Black accepts the gambit, grabbing the second pawn. Black is now two pawns up, but White will recapture with the knight, developing a piece with tempo. The position is now open with clear central lines — exactly what the gambit player wants.
Recapture with the knight to develop with tempo.
♘︎xc3 — White recaptures with the knight, developing a piece to a powerful central square. The ♘︎c3 controls d5 and e4, and White has completed the gambit sacrifice — a pawn for rapid development and open lines. White's compensation: - Development lead — the knight is already active - Open c-file — for rook pressure later - Central control — the e4 pawn dominates - Easy piece play — ♗︎c4, ♘︎f3, O-O come naturally
Black develops the knight to its most natural square, controlling d4 and e5. This is the most popular response, leading to the main line of the Smith-Morra Accepted. Black's alternatives include 4. ..e6 (Scheveningen setup) and 4. ..d6 (classical), but ♘︎c6 is the most principled developing move.
Develop the second knight and prepare to castle.
♘︎f3 — White develops the second knight to its ideal square, controlling d4 and e5 while preparing to castle kingside. With both knights developed, White is already ahead in piece activity. The development advantage is the heart of the gambit — White has two pieces out while Black has only one.
Alternative Moves
Black plays solidly, supporting e5 and preparing to develop the bishop. The ..d6 setup leads to a Scheveningen-like structure, which is one of Black's most reliable responses. The alternative 5. ..e6 is also popular, transposing to similar structures after ..d6 later.
Place the bishop on its most active diagonal targeting f7.
The bishop develops to its most aggressive diagonal, targeting the sensitive e6/f7 squares. From c4 it zeroes in on f7 — Black's weakest point. ♗︎c4 is the signature development square in the Smith-Morra — the bishop exerts maximum pressure and supports future tactical ideas like ♘︎d5 or e5 breaks.
Alternative Moves
Black solidifies the center with ..e6, blocking the ♗︎c4's diagonal toward f7. This creates the Scheveningen pawn structure (pawns on d6+e6), which is solid but limits the light-squared bishop. Black plans to develop with ..♗︎e7, ...O-O, and potentially ..a6/..b5 for queenside expansion.
Castle to safety.
O-O — White castles kingside, securing the king and activating the f1-rook. The rook stands behind the f-pawn and supports a potential f4 push. With three pieces developed and the king safe, White's lead in development is at its maximum. The next moves will focus on completing the buildup with ♕︎e2, ♖︎d1, and possibly ♗︎f4 or ♗︎g5.
Black develops the bishop modestly to e7, preparing to castle kingside. While not the most active square, ♗︎e7 is solid and avoids tactical tricks. The alternative 7. ..♘︎f6 develops with tempo against e4, but White can play e5 in some lines, creating complications.
Centralize the queen to support your pieces and prepare Rd1.
♕︎e2 — The queen moves to e2, supporting the e4 pawn. From e2, the queen also supports a future ♖︎d1 (pressuring d6) and keeps open the option of e5 or ♘︎d5 tactical ideas. This is a typical Smith-Morra setup move. White's pieces coordinate beautifully: ♗︎c4 targets f7, ♘︎c3 controls d5, ♘︎f3 supports e5, and now the queen ties everything together.
Key Takeaways
- Sacrifice a pawn for development — 2.d4 and 3.c3 open the position for White's pieces
- ♗︎c4 is the key developing move, targeting the f7 weakness
- Development advantage is temporary — act quickly before Black consolidates
- The open c-file and half-open d-file provide long-term pressure
- ♕︎e2 + ♖︎d1 is the standard setup, maximizing piece coordination
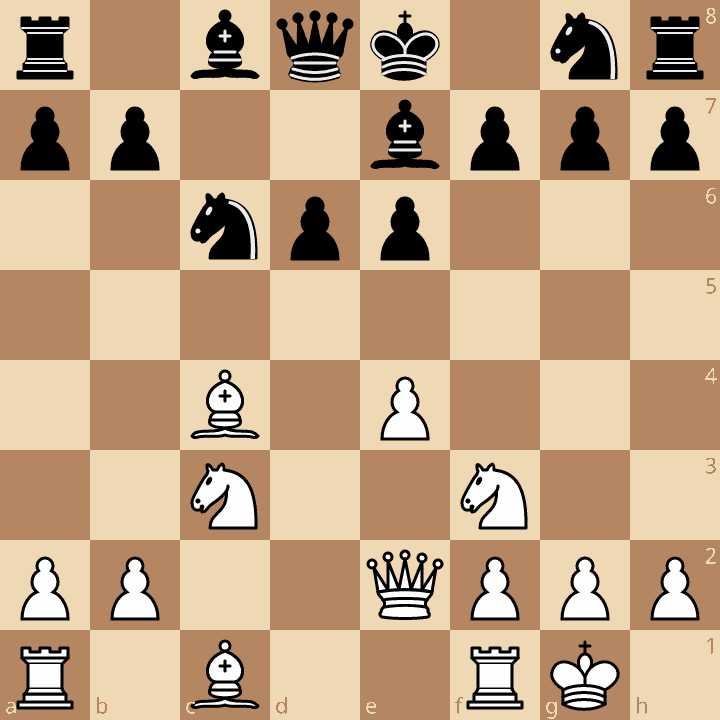
Now play it through
Step through every move on a real board, try the wrong ones, and ask Knighty why they fail.
Related Lessons
Summary
Ready to Practice?
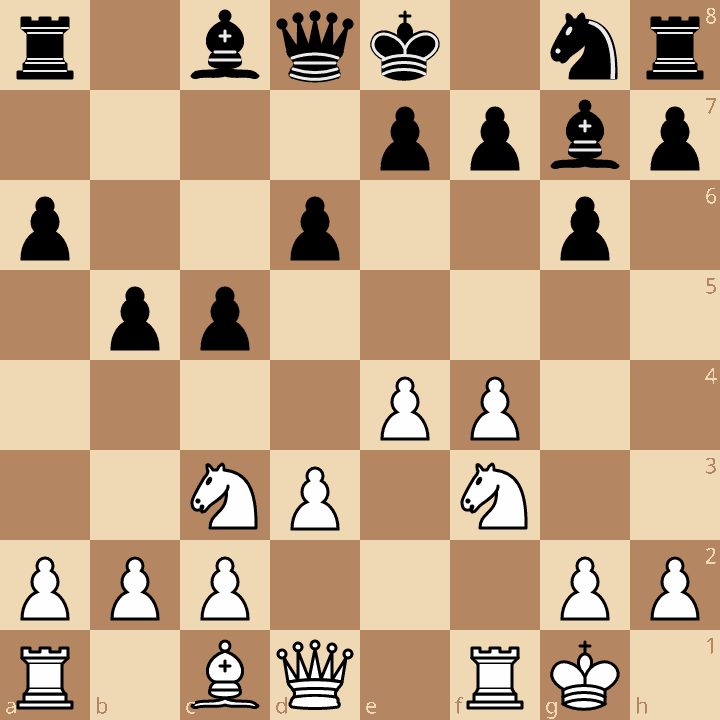
Next in this opening family
Grand Prix Attack
Take this lesson with you
Free account requiredWith every variation — opens in Lichess & ChessBase