
Chigorin Defense
A dynamic defense to the Queen's Gambit where Black develops the knight to c6 instead of supporting d5 with a pawn, prioritizing piece activity over pawn structure.
Try Interactive LessonIntroduction
Lesson Content
The Queen's Pawn opening — White claims the center and opens a diagonal for the dark-squared bishop. The d4 pawn is immediately defended by the queen, making it harder for Black to challenge than e4. Black's main responses: - 1. ..d5 — Queen's Gambit and Slav setups - 1. ..♘︎f6 — Indian Defenses (King's Indian, Nimzo-Indian, etc.) - 1. ..f5 — Dutch Defense
Mirror White and claim your share of the center.
d5 — Black matches White in the center, leading to the Queen's Pawn Game. The symmetrical center typically results in strategic maneuvering rather than immediate tactical battles. White's most popular continuation is 2. c4 — the Queen's Gambit.
The Queen's Gambit — White offers a pawn to lure Black's d5 pawn away from the center. It's not a true gambit since Black can't hold the pawn long-term. Black's main choices: - 2. ..e6 — Queen's Gambit Declined, solid and classical - 2. ..c6 — Slav Defense, supporting d5 while keeping the bishop free - 2. ..dxc4 — Queen's Gambit Accepted - 2. ..♘︎c6 — Chigorin Defense, our move!
Develop your knight to challenge the center — the Chigorin way!
♘︎c6 — The Chigorin Defense! Instead of a pawn move, Black develops the knight to c6 — a surprising and dynamic choice. The knight attacks d4 and supports a future ..e5 central break. Classical theory considers this dubious because the knight blocks the c-pawn. But Chigorin proved that active piece play can compensate for structural concessions. The knight immediately pressures White's center.
Alternative Moves
White develops naturally, defending d4 and preparing kingside development. This is the most common response to the Chigorin. White's alternatives: - 3. ♘︎c3 — also popular, leading to different variations - 3. cxd5 — exchanging early, simplifying the position - 3. e3 — solid but passive
Alternative Moves
Pin the knight to the queen — this is the key Chigorin idea.
♗︎g4 — The hallmark of the Chigorin Defense — Black pins the ♘︎f3 against the queen! This is the most aggressive and thematic continuation. Black intends to trade this bishop for the knight, wrecking White's pawn structure. The pin on f3 also makes it harder for White to maintain the d4-c4 pawn duo, since the knight is the key defender of d4.
Alternative Moves
White captures on d5, forcing Black to make a decision. This is the most principled response — by exchanging pawns, White aims to prove that Black's setup has weaknesses after the inevitable bishop-knight trade. White's alternatives: - 4. ♕︎a4 — the Alekhine Variation, developing the queen early - 4. e3 — solid but allows Black to maintain the pin
Capture the knight to double White's pawns — your strategic goal.
♗︎xf3 — Black captures the knight, giving White doubled f-pawns. This is the whole point of the Chigorin — Black trades a bishop for a knight to damage White's pawn structure permanently. The doubled f-pawns are a long-term weakness. Black gives up the bishop pair, but White's ruined kingside structure and awkward f-pawns provide lasting compensation.
Alternative Moves
White recaptures with the g-pawn — the main line, since exf3 would give up the e-pawn's central role. White now has doubled f-pawns (f2 and f3) and a half-open g-file, which can become a weapon in the middlegame. The position is unbalanced: White has the bishop pair and central pawns, while Black has better pawn structure.
Recapture the pawn with your queen — it belongs in the center.
♕︎xd5 — Black recaptures on d5 with the queen, restoring material equality. The queen is centrally placed and active, controlling key squares. Black's plan now is to play ..e5 to challenge White's d4 pawn. From d5 the queen also eyes the pawns on a2 and f3, keeping White honest.
White shores up the d4 pawn and prepares to develop the dark-squared bishop. The e3 pawn also opens the diagonal for the f1-bishop to develop to d3 or e2. White plays modestly here — the doubled f-pawns mean the kingside is already compromised, so White focuses on solid development.
Strike at the center — your knight on c6 supports this push.
The thematic central break! Black challenges White's d4 pawn directly, creating open lines and active play. This is the payoff for placing the knight on c6 — it supports ..e5 perfectly. The e5 push also opens the diagonal for Black's dark-squared bishop and creates tension that White must resolve.
Alternative Moves
White develops the knight to c3, attacking Black's centralized queen. The knight also supports a potential d5 advance and defends e4. White is banking on the bishop pair and central space to compensate for the damaged pawn structure.
Develop your bishop while pinning the knight.
♗︎b4 — Black develops the bishop with tempo, pinning the ♘︎c3 against the king. This creates immediate pressure and threatens to damage White's pawns again with ..♗︎xc3. The bishop on b4 is very active — it pins the knight, eyes the a5-e1 diagonal, and keeps White from castling comfortably.
Alternative Moves
White blocks the pin by developing the bishop to d2. This is the most natural response — it breaks the pin while developing a piece. White avoids the awkward a3 (which weakens the queenside) and keeps pieces coordinated.
Trade to isolate White's a-pawn — more structural damage.
♗︎xc3 — Black trades the bishop for the knight, creating an isolated a-pawn for White after the bxc3 recapture! Combined with the already doubled f-pawns, White's pawn structure is severely compromised. Black's knights will be superior to White's bishops in this damaged structure. The trade follows the Chigorin philosophy: sacrifice the bishop pair to wreck White's pawn structure.
Alternative Moves
White recaptures with the b-pawn, creating a weak c3 pawn with no b-pawn to support it. Combined with the doubled f-pawns, White's pawn structure is severely weakened — the a2 pawn is isolated. However, White retains the two bishops and open lines for dynamic compensation.
Centralize your queen to support e5 and maintain flexibility.
♕︎d6 — The queen retreats to d6, a strong centralized square. From d6, the queen supports the e5 pawn, eyes the kingside, and stays out of tactical tricks on the d-file. Black's position is very comfortable — solid pawn structure, active pieces, and clear plans. The queen also monitors the d-file and can swing to the kingside if needed.
Alternative Moves
White activates the rook on the half-open g-file — one of the benefits of the doubled f-pawns. The rook pressures g7 and prepares to generate kingside play. This is White's main trumpcard: using the half-open g-file and the bishop pair to create attacking chances before Black's superior structure tells in the endgame.
Defend the g-file before White can exploit it.
Black calmly defends along the g-file, preventing any immediate ♖︎g7 infiltration. More importantly, g6 allows Black to castle kingside safely — the king will be well-protected behind the g6-f7 pawn chain.
Alternative Moves
White develops the queen to b3, targeting the b7 pawn and the f7 square. The queen is actively placed and creates threats along the a2-g8 diagonal. White is trying to generate initiative before Black completes development and consolidates the structural advantage.
Develop your last knight — castling is next.
Black develops the last minor piece, preparing to castle kingside. The knight heads to e7 rather than f6 to keep the f-pawn free to advance and to support the ♘︎c6. With ..♘︎ge7, Black is ready to castle and enter a favorable middlegame — solid structure, well-placed knights, and targets on White's doubled pawns.
Alternative Moves
Key Takeaways
- 2...♘︎c6 challenges d4 with a piece instead of a pawn — the Chigorin philosophy
- 3...♗︎g4 pins the knight and prepares to damage White's pawn structure
- Trading ♗︎xf3 gives White doubled f-pawns — a permanent weakness
- The ...e5 break is the key central challenge, supported by the ♘︎c6
- Black's knights outperform White's bishops in the resulting closed positions
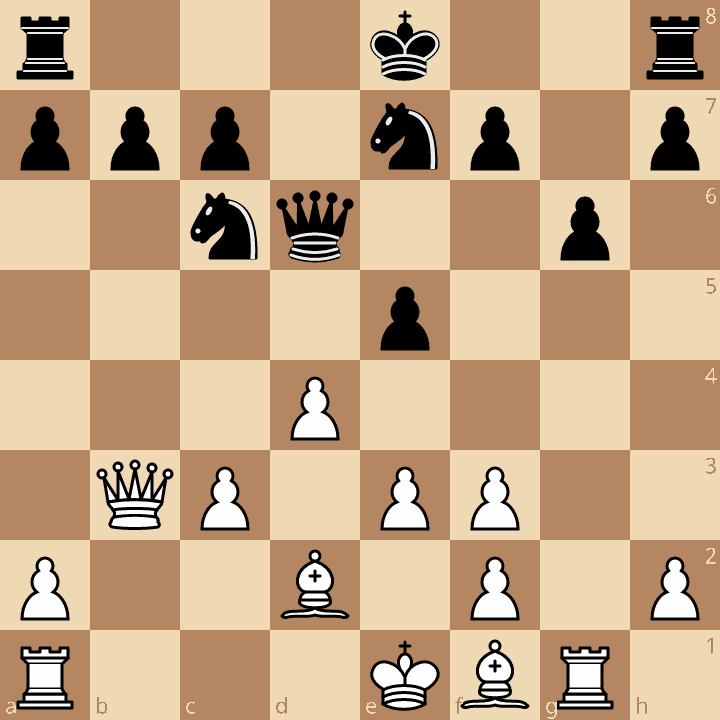
Now play it through
Step through every move on a real board, try the wrong ones, and ask Knighty why they fail.
Related Lessons
Summary
Ready to Practice?
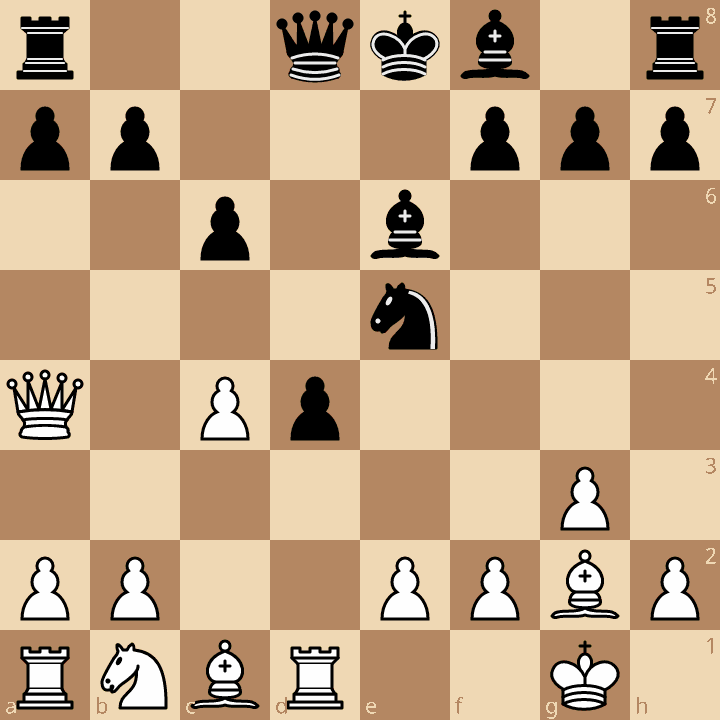
Next in this opening family
Albin Counter-Gambit - Fianchetto Line
Take this lesson with you
Free account requiredWith every variation — opens in Lichess & ChessBase