
Nimzo-Indian Defense - Classical Variation
Pin the knight, trade the bishop, and dominate the light squares with Black's most respected defense to 1.d4
Try Interactive LessonIntroduction
Lesson Content
The Queen's Pawn opening — White claims the center with the d-pawn, which is immediately defended by the queen. This tends to lead to more strategic, closed positions compared to 1. e4. Black's main responses: - 1. ..d5 — Queen's Gambit and Slav setups - 1. ..♘︎f6 — Indian Defenses (King's Indian, Nimzo-Indian, etc.) - 1. ..f5 — Dutch Defense
Develop the knight to control the e4 square.
♘︎f6 — Black develops the knight and controls e4, preventing White from building the ideal e4+d4 center easily. This is the gateway to all Indian Defense systems. Black delays committing a pawn structure, staying flexible to choose between King's Indian, Nimzo-Indian, Queen's Indian, and more.
White reinforces control of d5 and grabs more space. Combined with d4, the two pawns dominate the center. Now Black's response determines the opening system: - 2. ..e6 — Nimzo-Indian (after 3. ♘︎c3 ♗︎b4) or Queen's Indian - 2. ..g6 — King's Indian or Grunfeld - 2. ..c5 — Benoni structures - 2. ..e5 — Budapest Gambit
Stay flexible — prepare either ...d5 or ...Bb4.
e6 — Black prepares ..d5 or ..♗︎b4 (Nimzo-Indian). This is a flexible move that keeps many options open. If White plays 3. ♘︎c3, Black can pin with ..♗︎b4 (Nimzo-Indian); if 3. ♘︎f3, Black can play ..b6 (Queen's Indian) or ..d5 (QGD transposition).
White develops the knight to its natural square, supporting e4. Now Black faces a critical choice: - 3. ..♗︎b4 — Nimzo-Indian Defense, pinning the knight - 3. ..d5 — Queen's Gambit Declined transposition - 3. ..c5 — Benoni structures
Pin the knight to prevent e4.
♗︎b4 — The Nimzo-Indian Defense — Black pins the ♘︎c3, preventing e4 and creating immediate strategic tension. The Nimzo is considered one of the best defenses against 1. d4, used extensively by Kasparov, Kramnik, and Carlsen. Black may double White's pawns with ..♗︎xc3, creating a long-term structural imbalance.
The Classical Variation. White moves the queen to c2 so that if Black captures on c3, the queen recaptures — avoiding doubled c-pawns. This is the most positional approach to the Nimzo-Indian. White's main fourth-move choices define the variation: - 4. ♕︎c2 — Classical, sidesteps doubled pawns - 4. e3 — Rubinstein, accepts potential doubled pawns - 4. f3 — Kmoch, preparing a big center with e4
Alternative Moves
Castle to safety before committing your pawn structure.
O-O — Black castles immediately, getting the king to safety before deciding on a pawn structure. This is the most flexible response, keeping options like ..d5, ..c5, and ..d6 all open.
Alternative Moves
White asks the bishop: stay or exchange? Black must decide immediately. In this line Black exchanges, aiming for long-term light-square control after developing ..♗︎b7.
Alternative Moves
Trade the bishop for the knight — remove the e4 supporter.
♗︎xc3+ — Black captures the knight, giving up the dark-squared bishop but removing White's key piece that supports e4. The queen recaptures to avoid doubled pawns — spending another tempo on the queen.
The queen recaptures, as planned from move 4. White avoids doubled c-pawns but the queen sits on an exposed square. White now has the bishop pair as compensation for the lost time.
Prepare the bishop fianchetto to control the long diagonal.
b6 — The Keres Defense — Black prepares to fianchetto the bishop to b7, creating a powerful presence on the long diagonal. The bishop on b7 will target e4, making it even harder for White to build a central pawn there.
Alternative Moves
White develops the bishop aggressively, pinning the ♘︎f6 against the queen on d8. This creates tactical pressure and prepares a potential ♗︎xf6 exchange to weaken Black's kingside.
Alternative Moves
Develop the bishop to the long diagonal as planned.
♗︎b7 — The bishop takes its ideal diagonal, aiming at e4 and g2. Combined with ..d5, this bishop becomes the strategic backbone of Black's position — controlling light squares that White's pawns can no longer defend.
Alternative Moves
White reinforces the e4 square, preparing a future e4 push. This aggressive approach was favored by Kasparov, aiming for a massive pawn center with f3-e3-d4-c4. The trade-off: the king loses some castling flexibility.
Alternative Moves
Challenge the bishop — force it to commit.
h6 — Now Black challenges the ♗︎g5. If White retreats (♗︎h4), the pin on the knight loosens. If White exchanges (♗︎xf6), Black recaptures and White gives up the bishop pair. Either way, Black gains clarity about White's intentions.
White maintains the pin, retreating to h4 where the bishop stays active along the diagonal. It keeps pressure on f6 and eyes potential entry to d8 if the position opens.
Strike at the center — your bishop on b7 supports this advance.
The thematic central strike! Black challenges White's pawn center directly. With the bishop already on b7 supporting d5, this creates concrete tension that White must resolve. The stage is set for the critical trade sequence.
White solidifies the d4-e3-f3 pawn chain and opens the diagonal for the ♗︎f1. The center is locked in tension — White will look to resolve it with cxd5 at the right moment.
Develop the knight and prepare to recapture on d5.
♘︎bd7 — Black develops the last minor piece, supporting the ♘︎f6 and preparing to recapture on d5 with the knight rather than a pawn. The knight on d7 also eyes c5 and e5 as future outposts.
Alternative Moves
White releases the central tension. The critical question now is how Black recaptures — the knight recapture is the strongest, centralizing powerfully on d5.
Recapture with the knight to centralize on the d5 outpost.
♘︎xd5 — The knight lands on the powerful d5 outpost — a dream square! It attacks the queen on c3 and cannot easily be challenged by White's pawns (the c-pawn is gone). This leads to a famous queen exchange: 12. ♗︎xd8 ♘︎xc3 13. ♗︎h4, where both sides lose their queens but Black's active pieces and light-square control give excellent play.
Alternative Moves
Key Takeaways
- 3...♗︎b4 pins the ♘︎c3 and prevents White from easily achieving e4
- 4.♕︎c2 prepares to recapture on c3 with the queen, avoiding doubled pawns
- Trading ...♗︎xc3+ removes the key knight supporting e4 — worth giving up the bishop pair
- ...b6 and ...♗︎b7 control the long diagonal, creating permanent light-square pressure
- The knight recapture ...♘︎xd5 centralizes powerfully and attacks the queen on c3
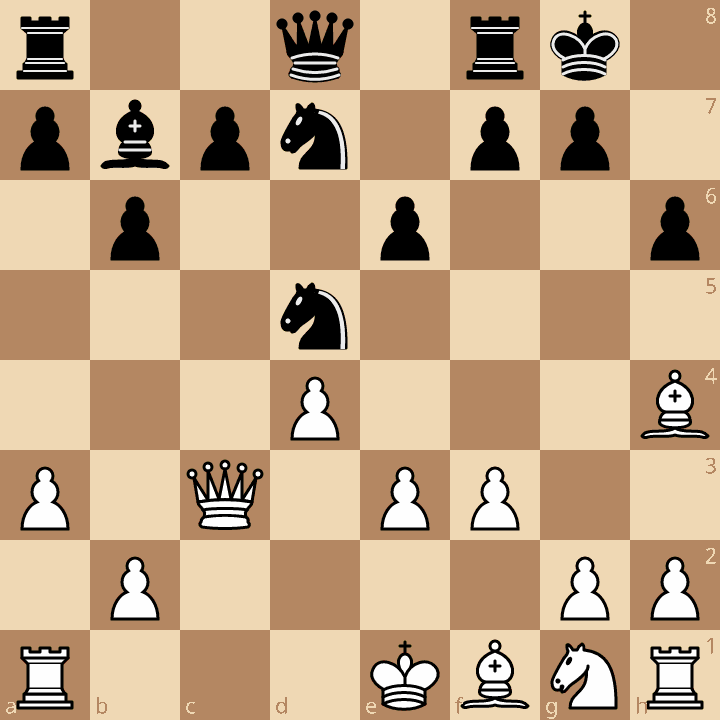
Now play it through
Step through every move on a real board, try the wrong ones, and ask Knighty why they fail.
Related Lessons
Summary
Ready to Practice?
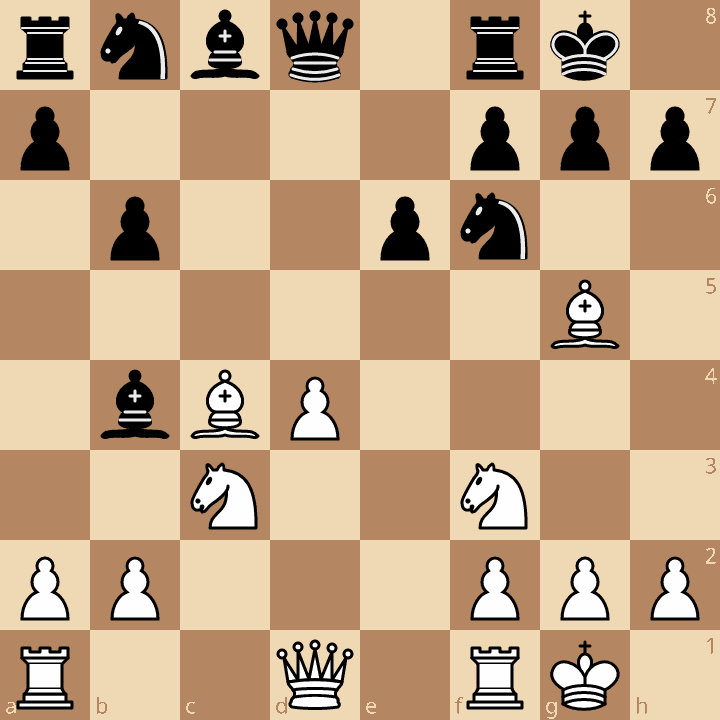
Next in this opening family
Nimzo-Indian Defense - Rubinstein Variation
Take this lesson with you
Free account requiredWith every variation — opens in Lichess & ChessBase