
Nimzo-Indian Defense - Sämisch Variation
White accepts doubled c-pawns and builds a massive center with f3 and e4. Black targets the weak pawns and fights back on the flanks.
Try Interactive LessonIntroduction
Lesson Content
The Queen's Pawn opening — White claims the center with the d-pawn, which is immediately defended by the queen. This tends to lead to more strategic, closed positions compared to 1. e4. Black's main responses: - 1. ..d5 — Queen's Gambit and Slav setups - 1. ..♘︎f6 — Indian Defenses (King's Indian, Nimzo-Indian, etc.) - 1. ..f5 — Dutch Defense
Develop the knight to control the e4 square.
♘︎f6 — Black develops the knight and controls e4, preventing White from building the ideal e4+d4 center easily. This is the gateway to all Indian Defense systems. Black delays committing a pawn structure, staying flexible to choose between King's Indian, Nimzo-Indian, Queen's Indian, and more.
White reinforces control of d5 and grabs more space. Combined with d4, the two pawns dominate the center. Now Black's response determines the opening system: - 2. ..e6 — Nimzo-Indian (after 3. ♘︎c3 ♗︎b4) or Queen's Indian - 2. ..g6 — King's Indian or Grunfeld - 2. ..c5 — Benoni structures - 2. ..e5 — Budapest Gambit
Stay flexible — prepare either ...d5 or ...Bb4.
e6 — Black prepares ..d5 or ..♗︎b4 (Nimzo-Indian). This is a flexible move that keeps many options open. If White plays 3. ♘︎c3, Black can pin with ..♗︎b4 (Nimzo-Indian); if 3. ♘︎f3, Black can play ..b6 (Queen's Indian) or ..d5 (QGD transposition).
White develops the knight to its natural square, supporting e4. Now Black faces a critical choice: - 3. ..♗︎b4 — Nimzo-Indian Defense, pinning the knight - 3. ..d5 — Queen's Gambit Declined transposition - 3. ..c5 — Benoni structures
Pin the knight to prevent e4.
♗︎b4 — The Nimzo-Indian Defense — Black pins the ♘︎c3, preventing e4 and creating immediate strategic tension. The Nimzo is considered one of the best defenses against 1. d4, used extensively by Kasparov, Kramnik, and Carlsen. Black may double White's pawns with ..♗︎xc3, creating a long-term structural imbalance.
The Sämisch Variation! White immediately asks the question: will Black give up the bishop pair? This is the most direct approach — White wants the two bishops and a big pawn center, and is willing to accept doubled c-pawns. White's alternatives take different approaches: - 4. ♕︎c2 — Classical, avoiding doubled pawns - 4. e3 — Rubinstein, solid development - 4. ♘︎f3 — Kasparov Variation, flexible
Alternative Moves
Capture the knight to double White's pawns.
♗︎xc3+ — Black captures the knight, doubling White's c-pawns. This is the principled response — Black gives up the bishop pair but inflicts permanent structural damage. The doubled c-pawns will be a target throughout the game, especially the weak c4 pawn. Black could retreat with ..♗︎e7, but that would concede the center without compensation.
Alternative Moves
White recaptures toward the center, gaining control of d4 but creating a doubled c-pawn structure. White now has the bishop pair and plans to use the broad center as a launching pad with f3 and e4. The doubled c-pawns (c3 and c4) are the price White pays — they can't support each other and the c4 pawn in particular becomes a target.
Prepare to target the weak c4 pawn with your bishop.
b6 — Black prepares to develop the light-squared bishop to a6, aiming directly at the weak c4 pawn. This is the most popular response in the Sämisch — Black's strategy revolves around pressuring White's doubled pawns. Black's alternatives: - 5. ..c5 — immediately fighting the center - 5. ..d5 — classical approach, challenging c4 with a pawn - 5. ..O-O — flexible, delaying the decision
Alternative Moves
The hallmark of the Sämisch! White prepares e4 to build a massive pawn center. The pawn on f3 supports e4 and takes away the ♘︎g4 square, though it does slow down kingside development. This is the most aggressive plan — White stakes everything on the center. The knight will have to develop to h3 or e2 instead of f3.
Target the weak c4 pawn with your bishop.
♗︎a6 — The bishop takes aim at the c4 pawn — Black's primary target in this structure. From a6, the bishop also x-rays the a6-f1 diagonal through c4, making it difficult for White to develop the kingside bishop to d3 or e2 without addressing the pressure. This is the thematic move in the Sämisch: Black's light-squared bishop becomes the star piece, exploiting the light-square weaknesses created by f3.
White achieves the ideal Sämisch center — pawns on c4, d4, e4, and f3 control a vast amount of space. This is the payoff for accepting doubled pawns: a dominating central pawn mass. But the center is also a committal structure — if Black can undermine it, the pawns become weaknesses rather than strengths.
Develop your knight to pressure the center.
♘︎c6 — Black develops the knight to a natural square, adding pressure on d4. The knight on c6 is flexibly placed — it can reroute to a5 to attack the c4 pawn, or stay on c6 to support a future ..e5 or ..d5 break. Developing pieces before committing to a pawn break is key — Black waits for the right moment to strike.
Alternative Moves
White develops the bishop to an aggressive square, pinning the ♘︎f6 against the queen. This is the most active development — White utilizes the bishop pair immediately. The pin also makes it harder for Black to break with ..d5 since the knight on f6 is tied down.
Challenge the bishop and ask it to commit.
Black asks the bishop to declare its intentions. This is a useful move — it forces the bishop to retreat to h4 where it can be challenged later with ..g5. This gains information without wasting time, as ..h6 is often a useful move in any case for king safety.
Alternative Moves
The bishop retreats but maintains the pin on ♘︎f6. From h4, the bishop is somewhat offside but still exerts pressure along the h4-d8 diagonal. Black can now challenge it with ..g5, which gains space but weakens the kingside.
Jump to a5 to add pressure on c4.
♘︎a5 — The knight hops to a5, directly attacking the weak c4 pawn. Combined with the ♗︎a6, Black now has two pieces targeting c4 — a classic Nimzo-Indian theme. White must either defend c4 or advance it. The knight on a5 is temporarily on the rim, but its purpose is clear and concrete: win or weaken the c4 pawn.
Alternative Moves
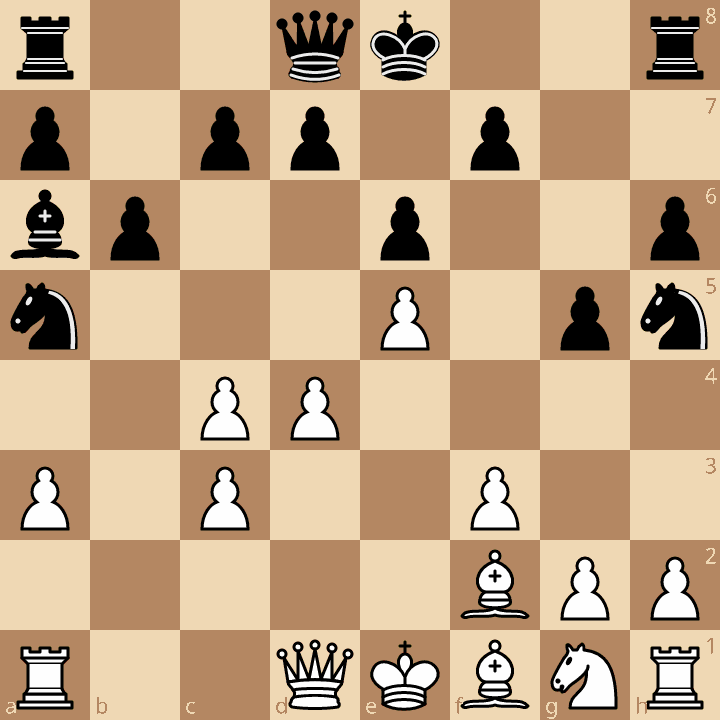
White pushes forward aggressively! The e5 advance gains space, kicks the ♘︎f6, and opens lines for the bishops. This is the critical moment — White goes all-in on the kingside attack rather than defending c4 passively. The pawn on e5 restricts Black's knight and creates attacking chances, but it also overextends White's center.
Attack the bishop while gaining space.
A bold flank strike! Black attacks the ♗︎h4, forcing it to retreat while gaining kingside space. This is a double-edged decision — Black weakens the kingside but gains the initiative for potential kingside counterplay. The g5 push is thematic when the bishop is on h4: it forces the bishop to a passive square.
Alternative Moves
The bishop retreats to f2, a safe and useful square where it defends the kingside and supports the d4 pawn. From here, White can focus on completing development with ♗︎d3/♗︎e2 and ♘︎h3/♘︎e2. The bishop exchange has been avoided — White retains the bishop pair, but Black has gained significant space on the kingside.
Reroute the knight toward the powerful f4 square.
♘︎h5 — The knight retreats from the e5 pawn's attack but heads toward a powerful outpost. From h5, the knight eyes the f4 square — a dream square that would pressure White's center from behind. Black has achieved an excellent position: pressure on c4, space on the kingside, and an active knight heading for f4.
Alternative Moves
Key Takeaways
- 4.a3 forces the bishop trade — White gets the bishop pair but doubled c-pawns
- The c4 pawn is Black's primary target throughout the opening
- White's plan is f3 + e4 to build a dominating center
- Black's light-squared bishop on a6 is the star piece, exploiting light-square weaknesses
- ...g5 is a key resource to challenge the ♗︎h4 and gain kingside space
Now play it through
Step through every move on a real board, try the wrong ones, and ask Knighty why they fail.
Related Lessons
Summary
Ready to Practice?
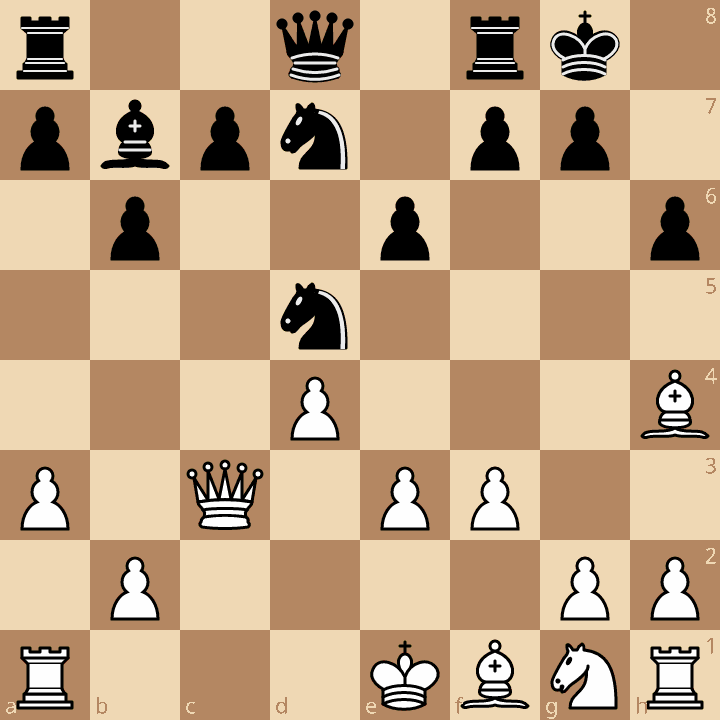
Next in this opening family
Nimzo-Indian Defense - Classical Variation
Take this lesson with you
Free account requiredWith every variation — opens in Lichess & ChessBase