
Pirc Defense - Austrian Attack
White builds a powerful pawn center with e4, d4, and f4, launching a kingside storm against Black's flexible Pirc setup.
Try Interactive LessonIntroduction
Lesson Content
Start by controlling the center with your king pawn.
e4 — The King's Pawn opening — White claims the center and opens diagonals for the queen and kingside bishop. The most popular first move in chess. Black's main responses: - 1. ..e5 — Open Game, matching White's center - 1. ..c5 — Sicilian Defense, fighting for d4 asymmetrically - 1. ..e6 — French Defense, preparing ..d5 - 1. ..c6 — Caro-Kann, also preparing ..d5
Alternative Moves
The Pirc Defense — Black takes a hypermodern approach, allowing White to build a full pawn center before challenging it. The d6 pawn supports a future ..e5 break and prepares ..♘︎f6 without allowing e5. Unlike 1. ..e5, the Pirc gives White a free hand in the center but offers Black flexible counterattacking chances later.
Claim the full center while Black allows it.
White seizes the full ideal center with pawns on e4 and d4. Against the Pirc, this is the most principled approach — accepting Black's invitation to occupy the center. With two central pawns, White controls key squares and has more space to develop pieces.
Alternative Moves
Black develops the knight to its best square, putting immediate pressure on e4. This forces White to defend or advance the center. The ♘︎f6 is the backbone of the Pirc setup — it attacks the center, prepares kingside castling via ..g6/..♗︎g7, and remains flexible.
Defend e4 while developing a piece.
White defends e4 and develops the knight to its most natural square. The ♘︎c3 also supports a future e5 advance and keeps the center intact. From here, White's next move determines the system: - 4. f4 — Austrian Attack, the most aggressive - 4. f3 — a slower buildup - 4. ♘︎f3 — Classical Pirc, developing naturally
Alternative Moves
Black prepares to fianchetto the dark-squared bishop on g7, where it will exert powerful long-diagonal pressure on the center and queenside. This is the defining setup of the Pirc Defense. The bishop on g7 will target the d4 pawn and the entire a1-h8 diagonal, providing latent pressure that becomes dangerous if the center opens.
Launch the Austrian Attack with an aggressive pawn push.
The Austrian Attack! White pushes f4 to build a massive three-pawn center (e4-d4-f4) and prepare a kingside pawn storm. This is the most aggressive system against the Pirc. White's alternatives here lead to different characters: - 4. ♘︎f3 — Classical system, solid development - 4. ♗︎e3 — preparing ♕︎d2 and ♗︎h6 - 4. ♗︎g5 — Byrne Variation, pinning the knight
Alternative Moves
Black completes the fianchetto, placing the bishop on the long diagonal. The ♗︎g7 is the cornerstone of Black's Pirc setup — it pressures the d4 pawn and controls key dark squares. The bishop's power will increase if the center opens, particularly after a future ..e5 break.
Develop the knight and prepare to castle.
White develops the knight to its natural square, supporting the d4 pawn and preparing to castle. The ♘︎f3 completes White's minor piece development on the kingside. White's pieces are well-coordinated: ♘︎c3 supports e4, ♘︎f3 supports d4, and the f4 pawn controls e5.
Alternative Moves
Black castles kingside, tucking the king to safety. While this looks natural, it also gives White a target — the kingside pawn storm with f5 can now be directed at Black's castled king. Black's rook also connects to the center, preparing to support the thematic ..e5 break.
Develop the bishop to an active square that supports the center.
♗︎d3 — The bishop develops to d3 where it serves multiple purposes: it reinforces e4, eyes the kingside (particularly the h7 square), and prepares castling. This is the Weiss Variation of the Austrian Attack — a well-organized setup where White completes development before launching the attack.
Alternative Moves
Black develops the last minor piece, adding pressure to d4 and e5. The knight on c6 prepares the thematic ..e5 pawn break, which is Black's main source of counterplay in the Pirc. Black's setup is now complete: pieces are developed, the king is safe, and ..e5 is ready.
Castle to safety before launching the attack.
O-O — White castles, securing the king. With the king safe, White is now ready to launch the attack. The stage is set: White has a massive pawn center and will look to advance with d5 and f5, while Black will seek counterplay with ..e5.
The thematic Pirc break! Black challenges White's center immediately, striking at d4 before White can consolidate. This is the critical moment of the opening — Black must act now or risk being steamrolled. If White captures (dxe5 or fxe5), the position opens and Black's ♗︎g7 becomes a monster on the long diagonal.
Close the center to prepare a kingside attack.
White closes the center, gaining space and preparing to push f5. The d5 pawn cramps Black's position and attacks the knight on c6. This is stronger than exchanging on e5, which would open lines for Black's bishop. With a closed center, the game becomes a race: White attacks on the kingside, Black seeks counterplay on the queenside or tries to undermine d5 with ..c6.
Alternative Moves
The knight leaps to the strong d4 outpost, the only central square still available after d5 closed the position. From d4, the knight pressures White's pieces and controls key squares. Black aims to trade this knight for White's f3 knight, reducing White's attacking force before the kingside storm arrives.
Launch the kingside pawn storm.
The kingside pawn storm begins! White pushes f5, aiming to open lines against Black's castled king. The f5 pawn attacks g6, threatening to crack open the kingside with fxg6. This is the Austrian Attack at its most dangerous — the three-pawn center has transformed into a powerful attacking wedge aimed directly at Black's king.
Alternative Moves
Black strikes at the d5 pawn chain, seeking queenside counterplay before White's kingside attack crashes through. If Black can open lines on the queenside, the ♗︎g7 and rooks can become very active. This is the critical race: White attacks the king, Black undermines the center.
Target the key defender of Black's kingside.
♗︎g5 — White pins the ♘︎f6, Black's key kingside defender. The bishop on g5 creates immediate tactical pressure — if the knight moves, the f-file could blow open with fxg6. Combined with f5, this creates a powerful attacking setup: White threatens to exchange or deflect the ♘︎f6 and break through on the kingside.
Alternative Moves
Black challenges the bishop, asking it to declare its intentions. This weakens the kingside slightly but is practically necessary — leaving the pin would make Black's position very uncomfortable. After the bishop retreats, the h6 pawn becomes a potential target if the h-file opens later.
Retreat the bishop while keeping pressure on the pinned knight.
♗︎h4 — The bishop retreats to h4, maintaining pressure on the ♘︎f6. White preserves the pin along the h4-d8 diagonal — the knight is still uncomfortable, and fxg6 threats remain in the air. White's attack is well-organized: the d5 and f5 pawns cramp Black, ♗︎g5-h4 pins the key defender, and the rooks are ready to join via the f-file.
Alternative Moves
Key Takeaways
- The f4 pawn thrust is what defines the Austrian Attack — it creates a three-pawn center and prepares a kingside pawn storm
- ♗︎d3 supports the e4 pawn and prepares O-O, while also eyeing the kingside for future attacking chances
- After Black plays ...e5, closing the center with d5 followed by f5 creates a powerful pawn wedge aimed at Black's king
- ♗︎g5 pins or pressures the ♘︎f6, which is a key defender of Black's kingside
- Black's counterplay typically involves ...c6 to undermine the d5 pawn — timing is critical for both sides
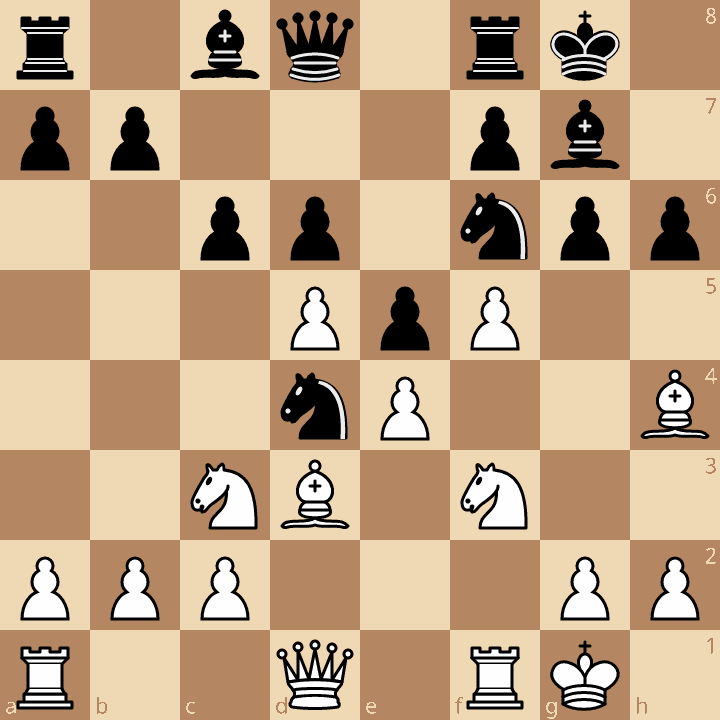
Now play it through
Step through every move on a real board, try the wrong ones, and ask Knighty why they fail.
Related Lessons
Summary
Ready to Practice?
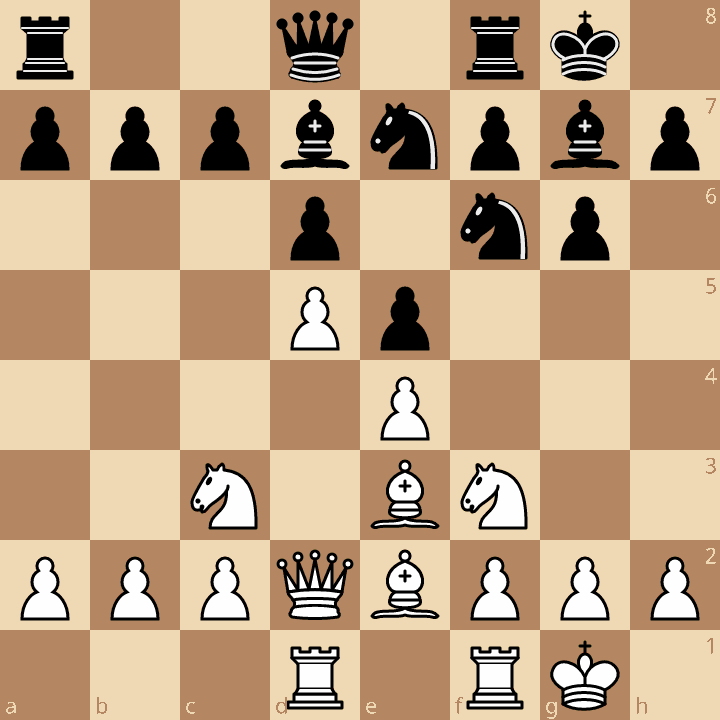
Next in this opening family
Pirc Defense - Classical Variation
Take this lesson with you
Free account requiredWith every variation — opens in Lichess & ChessBase