
Rapport-Jobava System
An aggressive d4 system where White develops ♘︎c3 and ♗︎f4 early, using the ♘︎b5 jump to disrupt Black.
Try Interactive LessonIntroduction
Lesson Content
Claim the center with your queen pawn.
d4 — The Queen's Pawn opening — White claims the center with the d-pawn, which is immediately defended by the queen. This tends to lead to more strategic, closed positions compared to 1. e4. Black's main responses: - 1. ..d5 — Queen's Gambit and Slav setups - 1. ..♘︎f6 — Indian Defenses (King's Indian, Nimzo-Indian, etc.) - 1. ..f5 — Dutch Defense
Black matches White in the center, leading to the Queen's Pawn Game. The symmetrical center typically results in strategic maneuvering rather than immediate tactical battles. White's most popular continuation is 2. c4 — the Queen's Gambit.
Develop your knight to support e4 and enable a future Nb5.
♘︎c3 — The defining move of the Jobava/Rapport systems — White develops the knight to c3 instead of the usual 2. c4 or 2. ♘︎f3. The knight supports e4 and, crucially, enables the aggressive ♘︎b5 jump later. This move order signals White's intention to play an independent system rather than transpose into the Queen's Gambit.
Alternative Moves
Black develops naturally, controlling e4 and preparing to castle. The knight on f6 is the most flexible response, keeping options open for various pawn structures. Black could also play 2. ..♗︎f5 or 2. ..e6, but ♘︎f6 is the most popular and principled reply.
Develop the bishop before closing it in with e3.
The bishop develops to f4 before being locked in by e3 — the hallmark of both the London and Jobava systems. Together with ♘︎c3, this creates the Rapport-Jobava setup. Unlike the standard London (♘︎f3 + ♗︎f4), the ♘︎c3 + ♗︎f4 combination creates much more dynamic possibilities, particularly the ♘︎b5 jump.
Alternative Moves
Black solidifies the d5 pawn and prepares to develop the dark-squared bishop. This is a solid, classical approach to the Rapport-Jobava. Black's main alternatives: - 3. ..g6 — fianchetto setup, leading to the Jobava London - 3. ..♗︎f5 — the most accurate reply, mirroring White's bishop development - 3. ..c5 — immediately challenging the center
Jump your knight to create an immediate tactical threat.
♘︎b5 — The signature move of the Rapport-Jobava! The knight jumps to b5, threatening the devastating ♘︎c7+ fork which would win the rook on a8. Black must address this immediately. This early knight sortie is the whole point of playing ♘︎c3 before ♘︎f3 — it forces Black into slightly awkward development to deal with the ♘︎c7 threat.
Alternative Moves
Black defends c7 with the knight, preventing the ♘︎c7+ fork. While ♘︎a6 looks unusual — knights on the rim are dim — it is the most accurate move here. The alternative 4. ..♗︎b4+ is also playable, gaining a tempo with check, but after 5. c3 the bishop must retreat and White gains central space.
Support your center and prepare to develop the bishop.
White solidifies the d4 pawn and opens a diagonal for the bishop. The e3 move is the most flexible continuation — White doesn't rush but builds calmly, knowing the ♘︎b5 has already disrupted Black's development. The knight on b5 can retreat to c3 later after Black plays ..c6, having accomplished its mission of forcing ..♘︎a6.
Alternative Moves
Black develops the bishop to e7, a modest but solid square. The bishop prepares kingside castling and stays out of tactical lines. Black can't play ..♗︎d6 effectively here since the ♗︎f4 controls that square, and ..♗︎b4+ has drawbacks after c3.
Complete your kingside development with the knight.
♘︎f3 — White develops the second knight. The knight heads to its natural f3 square, controlling e5 and d4 while preparing to castle. With both knights and the bishop developed, White has a harmonious setup despite the knight's earlier excursion to b5.
Alternative Moves
Black castles to safety. Castling is nearly forced here — delaying it would leave the king vulnerable in the center while White completes development.
Develop your bishop and prepare to castle.
The bishop develops to e2, a solid square that prepares kingside castling. While less aggressive than ♗︎d3, ♗︎e2 is the more accurate choice — it avoids blocking the d-file and keeps the position flexible. White's plan is clear: castle, bring the knight back from b5 after ..c6, then use the ♘︎e5 outpost.
Alternative Moves
Black finally kicks the knight from b5. This is the thematic response — the ♘︎b5 must retreat, and Black gains space on the queenside. But notice what White has achieved: Black spent time on ..♘︎a6 and ..c6, while White developed smoothly. The plan is ..c5 next, challenging White's d4 center.
Bring the knight back to its ideal central square.
♘︎c3 — The knight returns to c3 — mission accomplished. While retreating may seem like lost time, White forced Black into the awkward ..♘︎a6 and into spending a tempo on ..c6 (which could have been used for development). The knight is perfectly placed on c3, supporting e4 and controlling d5. This is the strategic payoff of the ♘︎b5 sortie: disruption for positional gain.
Black challenges the d4 center with the thematic ..c5 break. This is Black's main equalizing idea — opening the position and activating the pieces. The pawn had to go to c6 first (to push the ♘︎b5), so this break is a two-tempo investment.
Plant your knight on the powerful central outpost.
The knight occupies the powerful e5 outpost! This is the second key knight maneuver in the Rapport-Jobava — after the ♘︎b5 sortie, now ♘︎e5 stakes a claim in the center. The knight on e5 controls d7, f7, c6, and d3. White is happy to see ..c5 because it allows this strong centralization.
Alternative Moves
Black reroutes the awkwardly placed ♘︎a6 knight via b8 to d7, where it can challenge the powerful ♘︎e5. This is a common regrouping — the knight was forced to a6 by the early ♘︎b5 threat and now returns to a better circuit. This maneuver highlights the lasting impact of White's ♘︎b5 sortie.
Capture to open the center while Black is still regrouping.
dxc5 — White captures on c5, half-opening the d-file and creating a favorable pawn structure. With the knight firmly on e5 and the d-file about to open, White has excellent central control. The timing is right — capturing now while Black's knight is still rerouting maximizes the structural advantage.
Black recaptures with the bishop, placing it on an active diagonal. The bishop on c5 pressures the d4 square and targets White's e3 pawn. This is the best recapture — developing while recapturing.
Castle to complete your development.
O-O — White castles to safety, completing development. The rook lands on f1 with a view along the f-file, and the king is secure. White has achieved an excellent position: the ♘︎e5 dominates the center, all pieces are developed, and Black is still regrouping the ♘︎b8. From here, typical plans include ♘︎d3 (hitting the ♗︎c5), ♗︎f3 (pressuring d5), or f4 (supporting the knight).
Black finally reroutes the knight to d7, challenging the powerful ♘︎e5. This completes the knight's long journey from b8 → a6 (initially), then via b8 → d7. The position is roughly balanced but White's harmonious piece placement gives a slight edge in practice.
Key Takeaways
- ♘︎c3 + ♗︎f4 is the Rapport-Jobava setup — develop the bishop before e3 locks it in
- The ♘︎b5 jump is the signature idea, threatening ♘︎c7+ and disrupting Black
- After Black plays ...c6, retreat ♘︎c3 — the knight's sortie forced concessions
- ♘︎e5 is the second key maneuver, seizing the central outpost
- Black's ...♘︎a6 knight often needs rerouting via b8-d7, costing tempo
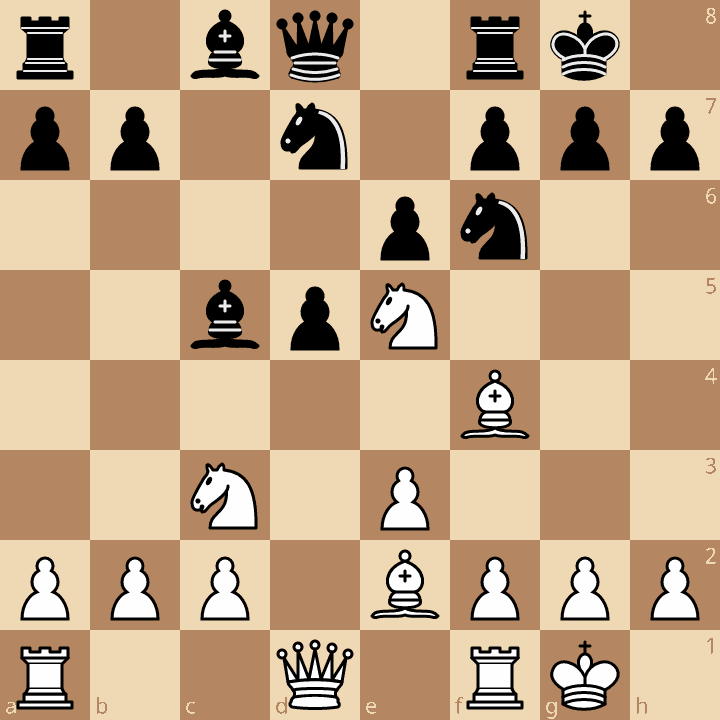
Now play it through
Step through every move on a real board, try the wrong ones, and ask Knighty why they fail.
Related Lessons
Summary
Ready to Practice?
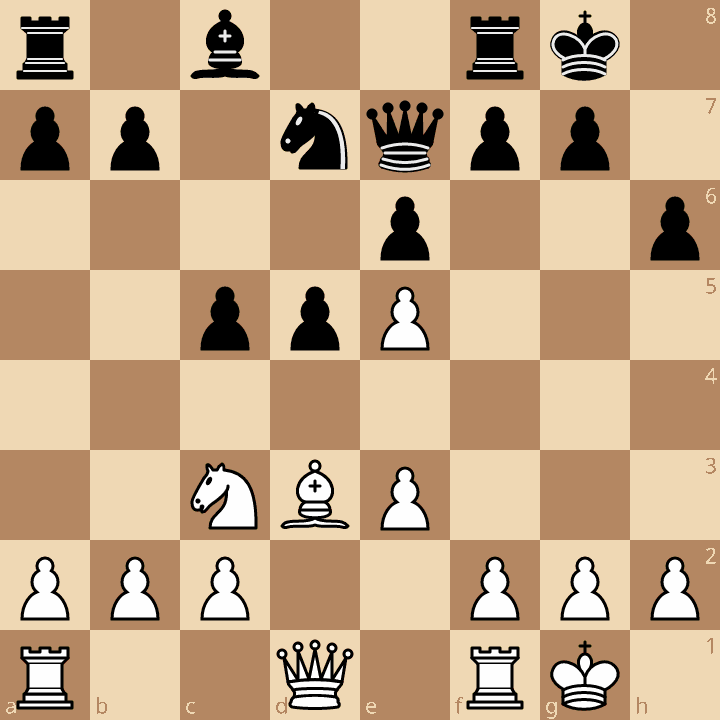
Next in this opening family
Veresov Opening
Take this lesson with you
Free account requiredWith every variation — opens in Lichess & ChessBase