
Veresov Opening
A surprise weapon where White develops ♘︎c3 and ♗︎g5 early, aiming for a quick e4 push to seize the center before Black is fully developed.
Try Interactive LessonIntroduction
Lesson Content
Claim the center with your queen pawn.
d4 — The Queen's Pawn opening — White claims the center with the d-pawn, which is immediately defended by the queen. This tends to lead to more strategic, closed positions compared to 1. e4. Black's main responses: - 1. ..d5 — Queen's Gambit and Slav setups - 1. ..♘︎f6 — Indian Defenses (King's Indian, Nimzo-Indian, etc.) - 1. ..f5 — Dutch Defense
Black matches White in the center, leading to the Queen's Pawn Game. The symmetrical center typically results in strategic maneuvering rather than immediate tactical battles. White's most popular continuation is 2. c4 — the Queen's Gambit.
Develop the knight to support a future e4 push.
♘︎c3 — The defining move of the Veresov Opening! Instead of the usual 2. c4 (Queen's Gambit) or 2. ♘︎f3, White develops the knight to c3 where it directly supports a future e4 push. This is the key difference from other d4 systems. White's alternatives lead to different openings: - 2. c4 — the Queen's Gambit, challenging d5 with the c-pawn - 2. ♘︎f3 — flexible, can lead to the Torre or London - 2. ♗︎f4 — the London System
Alternative Moves
Black develops naturally, controlling e4 and preparing to castle. This is the most common response — the knight on f6 directly fights against White's e4 plan. Black could also try 2. ..♗︎f5 (developing the bishop before e6 locks it in) or 2. ..c6 (reinforcing d5).
Alternative Moves
Target the knight before playing e3.
The second defining move of the ♖︎ichter-Veresov Attack! White targets the ♘︎f6, creating immediate pressure against the queen behind it. The bishop must come out before e3 blocks the diagonal — the same logic as in the Torre Attack. With ♘︎c3 + ♗︎g5, White's plan is clear: prepare e4 while the bishop disrupts Black's kingside coordination. If Black ever plays ..♘︎xe4, White can recapture ♘︎xe4 with a strong centralized knight.
Alternative Moves
Black develops the knight to d7, supporting the ♘︎f6 and keeping a solid, compact position. From d7 the knight can reroute later via b6 or f8. This is more cautious than 3. ..c5 (immediate counterplay) or 3. ..e6 (which blocks the light-squared bishop).
Alternative Moves
Develop your kingside knight.
♘︎f3 — White develops the kingside knight on its most natural square. From f3 the knight supports d4, controls e5, and prepares castling. With both knights and the dark-squared bishop developed, White has a flexible setup ready for either a slow buildup (e3, ♗︎d3, O-O) or a more aggressive e4 push.
Alternative Moves
Black challenges the bishop on g5, forcing it to make a decision. This is the strongest move — Black gains tempo and space on the kingside while asking White to commit. The bishop must choose: retreat to h4 (maintaining the pressure), go to f4 (London-style), or capture on f6 (giving up the bishop pair).
Retreat the bishop while keeping the pressure.
♗︎h4 — White retreats to h4, maintaining pressure along the h4-d8 diagonal. The bishop stays active and keeps pressure on the ♘︎f6 knight, which remains under attack. Retreating to f4 would lose the pressure entirely, and capturing on f6 would relieve Black's slightly cramped position.
Alternative Moves
Black solidifies the d5 pawn and prepares to develop the bishop to e7 (breaking the pin) followed by castling. This is a natural, solid approach. The downside is that the light-squared bishop is now locked behind the e6 pawn — a common trade-off in Queen's Pawn structures.
Support your center and prepare the bishop development.
White supports the d4 pawn and prepares to develop the light-squared bishop to d3. The bishop was already deployed to g5/h4 before e3 closed the c1-h6 diagonal — that's the whole point of the early ♗︎g5. With e3, White builds a solid pawn triangle and can now develop the remaining pieces harmoniously with ♗︎d3 and O-O.
Alternative Moves
Black develops the bishop to e7, breaking the pin on the ♘︎f6 knight and preparing to castle kingside. The bishop is modest on e7 but solid — it covers key squares and allows the king to reach safety. Now Black can castle on the next move and complete basic development.
Develop your bishop to aim at the kingside.
The bishop develops to its ideal diagonal, aiming at the kingside — particularly the h7 square near Black's future castled king. From d3 the bishop is perfectly placed for a future e4 push or a ♘︎e5 centralization. ♗︎d3 + ♘︎e5 is a powerful tandem in the Veresov — the bishop targets h7 while the knight attacks f7.
Black castles to safety, completing kingside development. The king is now secure behind the h6/g7/f7 pawn shield. With the bishop on e7 breaking the pin, castling was the natural follow-up.
Castle to safety and connect your rooks.
O-O — White castles kingside as well. All minor pieces are now developed. The opening phase is nearly complete — White has a harmonious setup with pieces pointed at the kingside. The stage is set for White's middlegame plan: ♘︎e5, centralizing the knight and creating kingside pressure.
Black strikes at the d4 pawn with the thematic ..c5 break. This is the standard way to fight for counterplay in d4 structures — challenging White's center before the attack builds. Black aims to open lines on the queenside and free the position before White launches a kingside initiative.
Centralize your knight on the powerful e5 square.
♘︎e5 — The knight leaps to the powerful e5 outpost — the climax of the Veresov's setup! On e5 the knight is centralized, attacks f7, and works in tandem with the ♗︎d3 along the b1-h7 diagonal. Rather than defending d4 passively, White counterattacks in the center. After the coming exchange on e5, White gains a space advantage with a pawn on e5.
Alternative Moves
Black captures the knight on e5. Leaving the strong knight on e5 is not an option — it controls too many squares and creates threats against f7. After the recapture, Black will have to deal with the pawn on e5. The trade half-opens the d-file and gives White a central space advantage.
Recapture to establish a strong central pawn.
dxe5 — White recaptures with the d-pawn, establishing a pawn on e5 — a powerful central wedge. The e5 pawn restricts Black's knight, which must retreat, and controls the f6 and d6 squares. White now has a lasting space advantage in the center. The next plan is to support the e5 pawn with f4 and build a kingside attack.
The knight retreats from f6 — forced by the e5 pawn that attacks the f6 square. From d7 the knight attacks the e5 pawn, but it's clearly less active than on f6. This retreat highlights the success of White's strategy: the e5 pawn cramps Black's position.
Exchange bishops — your pawn structure favors it.
♗︎xe7 — White trades the bishop for Black's ♗︎e7. With the pawn on e5 controlling the dark squares, White no longer needs the dark-squared bishop as much. The trade simplifies the position while maintaining the structural advantage. After the queen recaptures, White has a clear plan: f4 to support e5, and build pressure on the kingside.
Black recaptures with the queen. The resulting position is slightly favorable for White: the e5 pawn gives a lasting space advantage, the ♗︎d3 is more active than Black's remaining bishop (which is locked behind e6), and White can support the center with f4. Black must find active counterplay quickly, typically with ..c4 (pushing the bishop back) or ..f6 (challenging e5).
Key Takeaways
- 2.♘︎c3 is the key move — the knight supports e4, distinguishing the Veresov from the London (♗︎f4) and Torre (♘︎f3/♗︎g5)
- ♗︎g5 must come before e3, just like in the Torre Attack — develop the bishop before locking the diagonal
- ♘︎e5 is the thematic centralizing move, creating pressure alongside the ♗︎d3 on the b1-h7 diagonal
- After dxe5, the pawn on e5 cramps Black and controls key dark squares (f6, d6)
- White follows up with f4 to support e5 and build a kingside space advantage
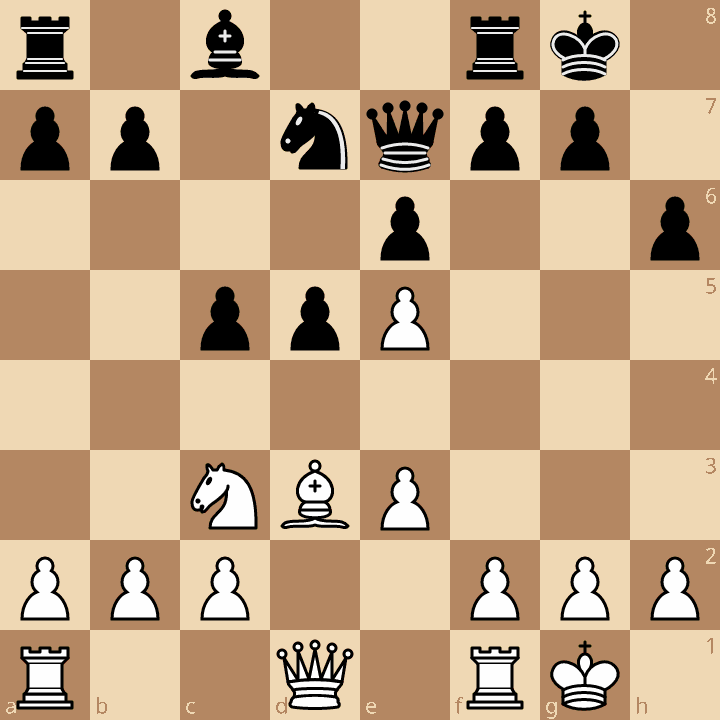
Now play it through
Step through every move on a real board, try the wrong ones, and ask Knighty why they fail.
Related Lessons
Summary
Ready to Practice?
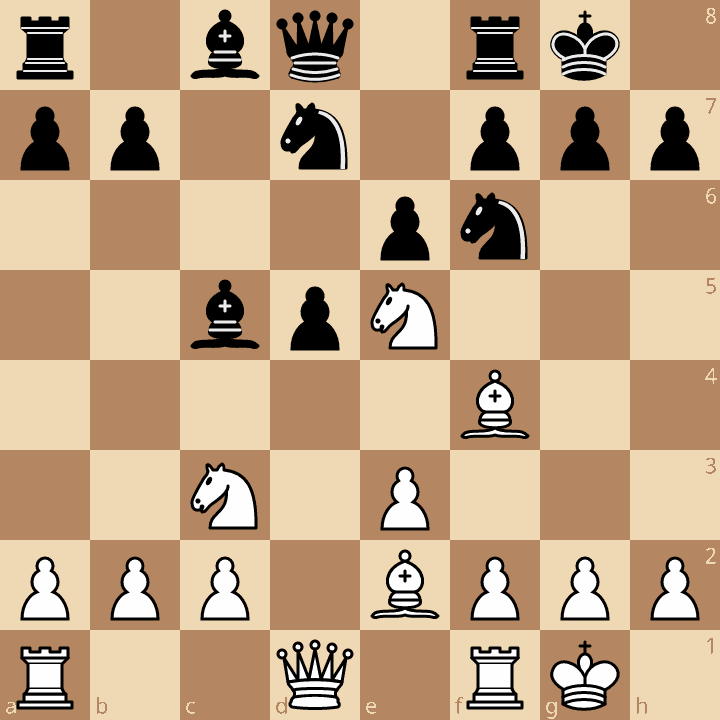
Next in this opening family
Rapport-Jobava System
Take this lesson with you
Free account requiredWith every variation — opens in Lichess & ChessBase